When most people think about hiring an interior designer, they
zero in on aesthetics: wall colors, window treatments, pillow patterns.
But that's just scratching the surface of what a designer can add to a
home. These pros go beyond cosmetic concerns to ensure that a space
feels harmonious through and through, from its floor plan and
architectural envelope to the last nailhead, tassel and tuft. Many states have a certification process for interior designers.
Not sure what your style is? Check out these
descriptions of interior design styles and how to achieve the look in your house.
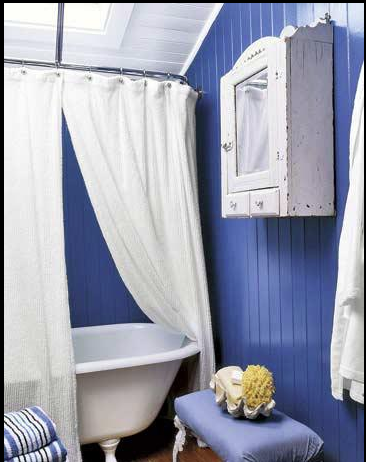
 What an interior designer does:
 A designer envisions, plans and
outfits spaces in a way that makes them both beautiful and functional.
He or she balances aesthetic considerations with structural planning to
reflect the clients' lifestyle, set the desired mood, complement the
home's architectural features, and ensure that less glamorous details
(like electrical outlets and air vents) fit into the scheme. An interior
designer also cultivates relationships with trusted artisans, vendors
and others who execute the design.
When to hire one: You
may have a clear vision for your home, but an interior designer can help
you bring it to life while making sure it satisfies nitty-gritty
considerations such as space planning. A trained eye and a creative
mind-set allow for devising solutions that you might never have
imagined, and attention to the tiniest details will transform your space
into a haven that looks polished and pulled together.
 What it will cost:
 Interior designers have various fee
structures. They might charge an hourly rate (anywhere from $50 to
$500); a flat fee, which could be as low as several thousand dollars and
as high as five figures; or a percentage of total project costs. You
may also be asked to pay a retainer before work begins.
Some
designers take an approach known as cost-plus — they purchase materials,
furnishings and more at a discount, then charge you the retail price,
keeping the difference as their fee. If yours uses this method, be sure
the cost discrepancies are transparent so that you'll know exactly what
you're paying for services.
If you're on a tight budget, don't
assume that hiring a designer is beyond reach. Many will be happy to
arrange a few hours of consulting or will help you source furnishings
and decorative accents.
Where to find one: The
directory of interior designers
on Houzz is a good starting place, where you can find designers in your
area and beyond and view their portfolios. Your local chapter of the
American Society of Interior Designers (ASID) is also a good source.
If
you spot a room you love when browsing Houzz photos and ideabooks, take
note of the designer's name. (You'll see a link to professionals'
profiles in the lower-right corner of their photos.) Some designers will
work with clients who are based in other cities, though travel time and
expenses can add up.
Friends with fabulous houses are another
likely source. You can also visit show houses and home tours to see
which spaces strike your fancy.

Be sure the designer is a good match for your style. No two
clients are alike, and good interior designers are nimble enough to hop
from urban pied-à-terre to rustic farmhouse to beachside getaway without
missing a beat. However, almost all of them have a fundamental
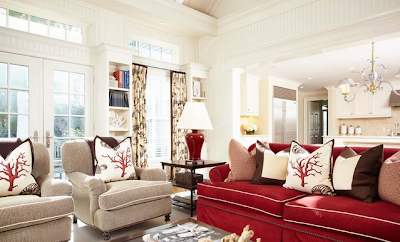
aesthetic that remains consistent throughout their work. For example, if
you want pure whites and pale
neutrals, don't choose a designer whose signature is
bold color palettes. When interviewing designers, look for parallels between their previous work and the design you want.
Collect samples. Even if you have trouble articulating your desired look,
pictures of rooms you love
can instantly give the designer a sense of what you crave. He or she
will ask you about specific points of the design that resonate with you
and use those as guidelines. Fabric swatches, paint chips, furniture
catalogs and your own Houzz ideabooks are other good sources for showing
items you like. On the flip side, pull examples of
colors, motifs and furniture styles that turn you off, which can be equally helpful.

Decide in advance which pieces must stay. Not willing to get rid
of your Biedermeier sideboard or your majolica collection? The process
will go more smoothly if you share that information with your designer
during the initial site visit and consultation. That way, he or she can
plan around the items that you don't want to give up.
Involve the designer as early as possible in the building process. If
you're remodeling or building from scratch, include the designer in the
planning stages with your architect and contractor. This way, the pros
involved will all be on the same page and can iron out any potential
discrepancies — particularly those that involve the bones of a home,
such as doorways, ceiling beams or interior columns. It's one thing to
reorient a window on paper; it's another entirely to move it after
installation.
Try to have all household members present at the outset. Having
everyone's input from the get-go helps to avoid potential conflicts down
the road. If a spouse or loved one objects to a certain color or
reveals that he or she just can't part with Granny's antique dining
table, it's easiest to work out those issues right away.
Ask the designer to clarify billing procedures.
Find out at the beginning when you'll be charged and what for. In
addition to the design itself, you may be billed for travel time, site
visits, shopping, phone conversations and more. Also, ask whether you'll
be getting furnishings, accents, materials or other items at a
discounted rate. This way, you'll be able to anticipate fairly closely
what and when to pay.
Keep an open mind. It's a rare client who loves 100 percent of a
designer's suggestions right off the bat. Your designer might recommend a
piece of furniture or a wallpaper pattern that you're iffy about, but
don't say no without giving the idea some time to sink in. Chances are
that when you ask your designer why he or she chose it, and when you
take a little time to live with it, you'll appreciate the reason it
works.
Look toward refreshing down the road. Even the
best design doesn't stay current forever. Ask your designer if tune-up
visits in the future are an option, whether they involve simply swapping
out a few accessories, reupholstering furniture or choosing new paint
colors.
To see the original article and designer credit click on Houzz.com


 What an interior designer does: A designer envisions, plans and
outfits spaces in a way that makes them both beautiful and functional.
He or she balances aesthetic considerations with structural planning to
reflect the clients' lifestyle, set the desired mood, complement the
home's architectural features, and ensure that less glamorous details
(like electrical outlets and air vents) fit into the scheme. An interior
designer also cultivates relationships with trusted artisans, vendors
and others who execute the design.
What an interior designer does: A designer envisions, plans and
outfits spaces in a way that makes them both beautiful and functional.
He or she balances aesthetic considerations with structural planning to
reflect the clients' lifestyle, set the desired mood, complement the
home's architectural features, and ensure that less glamorous details
(like electrical outlets and air vents) fit into the scheme. An interior
designer also cultivates relationships with trusted artisans, vendors
and others who execute the design.  What it will cost: Interior designers have various fee
structures. They might charge an hourly rate (anywhere from $50 to
$500); a flat fee, which could be as low as several thousand dollars and
as high as five figures; or a percentage of total project costs. You
may also be asked to pay a retainer before work begins.
What it will cost: Interior designers have various fee
structures. They might charge an hourly rate (anywhere from $50 to
$500); a flat fee, which could be as low as several thousand dollars and
as high as five figures; or a percentage of total project costs. You
may also be asked to pay a retainer before work begins.